Selamat datang di Affandi Blog Site's, gunakan mozila firefox, macromedia flash player, dan windows media player (plug-in) untuk mengakses blog ini dengan optimal, mohon maaf bila saya mematikan fungsi block (untuk copy - paste) dan klik kanan pada blog ini, Thank You.
Tampilkan postingan dengan label Tips n Trick. Tampilkan semua postingan

Minggu, 09 Agustus 2009

Menonton video streaming tanpa buffering

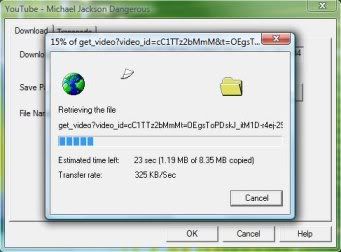
Program Video Accelerator bisa mempercepat bit-rate video streaming hingga 3-5 kali lebih cepat. Selain itu ada beberapa fungsi lain yang sangat membantu seperti "download" yang bisa digunakan untuk mendownload video dari beberapa situs video streaming
Photobucket
Situs yang didukung adalah:

YouTube, Facebook, Dailymotion, Veoh, Metacafe, 56.com, Youku, Tudou, CrunchyRoll, MegaVideo, 5min, 6.cn, 9you, Angry Alien, AnimeEpisodes.Net, Badjojo, Bebo, Blastro, Blennus, Blip.tv, Bofunk, BollywoodHungama, Break, Broadcaster, Buzznet, Chilevision.cl, ClipFish.de, ClipLife.jp, ClipJunkie, ClipShack, CollegeHumor, Current, Current TV, Dachix, Danerd, DailySixer.com, dalealplay, DevilDucky, Disclose.tv, DoubleAgent, eBaumsWorld, elpolvorin, eSnips, ExpertVillage, EVTV1, FindVideos, Flurl, FunnyJunk, FunnyorDie, Glumbert, GodTube, GoFish, Google Video, Graspr, iFilm, Hallpass, HowCast, HowStuffWorks, iShare.Rediff, Jokeroo, Jumpcut, Justin.tv, Kewego, Kontraband, ku6, Izlesene, LiveVideo, LiveLeak, lulu.tv, Mediabum, Midis.biz, MilkandCookies, Mojoflix, MonkeySee, Music.com, MusicMaza, MusicVideoCodes.info, Myspace, MyVideo.de, Newgrounds, NothingToxic, Pikniktube, Pixparty, Photobucket, PlsThx, PokerTube, Putfile, PWNorDIE, RetroJunk, Revver, RuTube.ru, SantaBanta, Sevenload, Sharkle, Shoutfile, Sina Videos, SmitHappens, Snotr, Spike, StreetFire.net, StupidVideos, SuperDeluxe, SuperNovaTube, TeacherTube, That Video Site, TheOnion, TinyPic, TotallyCrap, tu.tv, vbox7, Viddyou, Videa.hu, VideoWebTown, VideoCodesWorld, VideoCodeZone, videolectures, Vidiac, Vidivodo, vidiLife, VidPK, Vimeo, VReel.net, vSocial, Yahoo Videos, WeGame, Wuapi, Yikers, Yobler, YourFileHost, YouSportz, YummyBun, ZippyVideos, Zoopy, zShare.net,
... ...
program ini autorun setiap kita buka streaming video
Download

Read more.....

Sabtu, 08 Agustus 2009

Trik Sulap : Menghentikan denyut nadi

Berikut adalah definisi Kundalini dari Padmajaya.com : Kundalini berasal dari bahasa sansekerta yang berarti gulungan. Kundalini adalah suatu kekuatan yang luar biasa yang dimiliki setiap orang yang letaknya di perineum yaitu diantara anus dan kemaluan .Banyak aliran yoga yang menganggap bahwa untuk memperoleh pencerahan( tingkat kebangkitan spiritual tertinggi yang dapat di capai seseorang ,dimana seluruh rahasia alam dan kehidupan diketahui dengan jelas ) , seseorang harus membangkitkan kundalininya terlebih dahulu .

Effects : Anda bisa menghentikan denyut nadi tangan kiri anda selama beberapa saat.


Catatan :

Ada dua macam metode "Kundalini's Heartbeat". Yang pertama bisa dicapai tanpa trik, dengan latihan Yoga secara teratur, konstan, dan dalam waktu lama. Cara kedua adalah dengan menghentikan denyut nadi (bukan detak jantung) menggunakan trik yang dijabrakan di bawah ini .

WARNING :
Ada efek samping dari trik ini : Lengan terasa pegal, pening, dan mual. Jangan melakukannya terlalu lama. Risiko ditanggung sendiri.


Persiapan :

1. Ambil sebuah bola tenis atau bola karet. Jika tidak ada, anda bisa menggunakan kaus kaki yang dibentuk bulat menyerupai bola.

2. Ikatkan bola tersebut di pangkal lengan kiri anda, menghadap ke arah ketiak. Pastikan bola maupun ikatan tidak tampak terlalu menonjol, tersembunyi di balik lengan baju dan tidak terlihat aneh jika dilihat dari sudut pandang penonton.


Prosedur :


1. Panggil seorang sukarelawan naik ke atas panggung, beri ia sebuah lonceng. Jelaskan bahwa anda berniat menghentikan denyut jantung, anda selama beberapa saat. Katakan bahwa hal yang akan anda lakukan ini sangat berbahaya, dan memerlukan suatu kontrol pikiran yang luar biasa.


2. Duduklah di kursi dengan posisi yang nyaman. Suruh sang sukarelawan meraba denyut nadi tangan kiri anda dengan salah satu tangan, sedangkan tangan sukarelawan yang lain memegang lonceng.


3. Setiap kali sang sukarelawan merasakan satu denyut nadi, suruh ia membunyikan lonceng satu kali.


4. Perlambatlah denyut nadi anda, makin lama makin lambat, hingga akhirnya berhenti sama sekali. Untuk memperlambat dan menghentikan denyut nadi dapat dilakukan dengan menekankan bola yang tersembunyi di pangkal lengan kiri anda ke arah ketiak. Semakin keras anda menekankan bola tersebut, semakin lambat denyut nadi anda, dan akhirnya akan berhenti sama sekali.


5. Ketika denyut nadi anda sudah berhenti sama sekali (dapat diketahui ketika tidak ada lagi gemerincing bel yang dibunyikan sang sukarelawan), tunggu beberapa saat dan beraktinglah seolah-olah anda berada dalam keadaan mati. Jatuhkan diri anda dari kursi. tahan napas anda selama beberapa saat, dan buat diri anda seolah-olah tampak seperti "mati suri". Agar lebih dramatis, persiapkanlah seorang dokter untuk memeriksa denyut nadi anda.


6. Tunggu selama beberapa saat, kemudian buka mata anda dan nikmati aplaus meriah dari penonton.


Penting :

- Trik ini hanya digunakan untuk menghentikan denyut nadi pergelangan tangan kiri anda, bukan untuk menghentikan napas ataupun detak jantung. Jangan sampai sang sukarelawan memeriksa napas atau detak jantung anda.

- Ada efek samping melakukan trik ini : Anda mungkin akan merasa pusing, mual, ataupun kesemutan. Pastikan untuk berlatih dengan baik sebelum membawa trik ini ke atas panggung.


Penjelasan Ilmiah :
"A person can make the pulse on their wrist slow and stop for a short period of time by placing a rolled up pair of socks or a tennis ball in their armpit. By squeezing the arm in to the body, the blood flow is restricted and the pulse in that arm slows and may stop."

Intinya, seseorang dapat menghentikan denyut nadi pergelangan tangannya selama beberapa saat dengan cara menempatkan sebuah bola atau segulung kaus kaki di ketiaknya. Saat anda menekankan lengan anda ke arah tubuh (ketiak), aliran darah akan terhambat dan denyut nadi di pergelangan tangan akan semakin melambat, hingga akhirnya berhenti.

Read more.....

Kamis, 06 Agustus 2009

Adobe Premiere Pro E-Book

Adobe Premiere Pro merupakan software editing video digital yang diproduksi oleh Adobe System Inc. Program ini digunakan dalam proses paska produksi (post production) untuk mengolah video digital hasil shooting dengan menggunakan komputer yang kemudian didistribusikan ke dalam format
VCD maupun DVD. Buku Elektronik “Capturing dan Editing Video dengan Adobe Premiere Pro beserta Tip dan Triknya” ini memberikan bimbingan kepada Anda untuk menggunakan program aplikasi Adobe Premiere Pro dengan contoh latihan yang sering digunakan dalam proses pengolahan digital video, seperti proses capture, editing, visual effects, animasi keyframe, titling, rendering serta tips dan trik tingkat lanjut. Download materi-materi yang ada di dalam buku lewat link download di bawah ini.

Materi Buku :
* BAB I. Sekilas Tentang Produksi Video Download
* BAB II. Pengenalan Adobe Premiere Pro Download
* BAB III. Mengcapture Video dan Audio Download
* BAB IV. Proses Import dan Triming Download
* BAB V. Memberi Efek Transisi Download
* BAB VI. Memberi Efek Video Download
* BAB VII. Teknik Editing Tingkat Lanjut Download
* BAB VIII. Animasi Clip / Motion Graphics Download
* BAB IX. Membuat Title Download
* BAB X. Audio Treatment Download
* BAB XI. Tip dan Trik Download
* BAB XII. Mengekspor Movie Download


Read more.....

Rabu, 05 Agustus 2009

Extract di Photoshop CS4 lenyap!

Tenang, kekhawatiran Anda pernah saya alami. Berikut ini solusinya…

Bagi mereka yang baru saja memindahkan berkas kerjanya ke versi CS4 dari versi yang lebih lama akan terbingung-bingung karena ada beberapa plugin dan preset yang menghilang entah ke mana alias lenyap ditelan bumi.
Yang paling kentara adalah fungsi “extract” pada menu “filters” akibat dari transisi versi CS3 ke versi terbaru CS4. Jangan takut, plugin dan preset yang hilang ini dapat diunduh dan di-install satu per satu atau bisa Anda dapat kan dari folder “Goodies” pada DVD installer CS4 Anda. Kalau Anda tidak dapat menemukannya, berikut ini taut untuk mengunduh berkas tersebut:

http://www.indowebster.com/PHSPCS4_CONTENT.html

Termasuk di dalamnya adalah plugin 32-bit dan 64-bit untuk Photoshop CS4 versi English, Spanish dan French. Berikut ini isi dari paket unduh tersebut:

• Bigger Tiles
• Picture Package (ContactSheetII)
• ExtractPlus
• PatternMaker
• PhotomergeUI
• Web Photo Gallery (WebContactSheetII) plus presets
• script for Layer Comps to Web Photo Gallery
• Texture presets for Texturizer

Juga termasuk di dalamnya adalah Optional Plug-Ins ReadMe.

Setelah meng-extract berkas tadi, pastikan juga Anda meng-copy berkas (file) tersebut ke folder yang Anda inginkan (bila diperlukan).

Contoh: Untuk ExtractPlus ada pada folder:

Adobe CS4 > Photoshop Content > English > Goodies > Optional Plug-ins > Plug-ins 32bit > Filters

Copy paste ke:

Program Files > Adobe > Adobe Photoshop CS4 > Plug-ins > Filters

Juga copy paste ExtractPlus.8BF dan PatternPlus.8BF pada lokasi yang sama ke dalam folder yang seharusnya. Pada kasus ini, saya bekerja pada sistem 32bit dan antarmuka berbahasa Inggris (English interface). Bila khawatir akan terjadinya berkas yang dobel, biasanya diasumsikan bahwa berkas-berkas yang tidak diikut sertakan pada paket orisinal CS4 itu biasanya merupakan ancang-ancang akan di tidaki kut sertakannya berkas tersebut pada versi yang akan datang. Ya kita cuma bisa melihat dan menunggu apakah benar demikian. Semoga solusi ini membantu.
Read more.....

Selasa, 25 Maret 2008

Notebook / Laptop Memory (RAM) Upgrade In 5 Minutes Or Less

This article is set up in two parts, one part about RAM overview and a second part about RAM upgrade. If you are curious on how the RAM works, you will find a detail summary that should give you all the information that you need to know about RAM, organization and speed. If you just want to read the how to upgrade section, move on directly to part two Upgrade your laptop ram in 5 minutes or less.


1 – RAM Overview

There are two big categories of random access memories:

* Dynamic memories (DRAM, Dynamic Random Access Module), not very costly. They are in most cases used for the central memory of the computer

* Static memories (SRAM, Static Random Access Module), quick and expensive. SRAM is notably used for cache memories of the processor

Functioning of the random access memory

The random access memory is constituted of hundred of thousand small condensers storing charges. When it is loaded, the logical state of the condenser is equal to 1, otherwise it belongs to 0, what means that every condenser represents one bit of memory.

Given that condensers off-load, it is always necessary to recharge them in a space of regular time called cycle of refreshment. Memory DRAM requires cycles of refreshment for instance (Ns) is about 15 nanoseconds.

Every condenser is coupled with a transistor allowing to "recover « or to change the state of the condenser. These transistors are lined up in form of matrix, that is they achieve a hut memory (so called memory) by a line and a column.

So, for a memory of type DRAM, the time of access is of 60 nanoseconds (35ns of delay of cycle and 25 ns of time of latency). On a computer, the time of cycle corresponds contrary to the frequency of the clock, for instance for a computer pulsated in 200 MHz, the time of cycle is 5 ns (1 / (200*106)).

As a result a computer having a frequency well brought up and using memories the time of access of which is much longer than the time of cycle of the processor must perform cycles of wait to access to the memory. In the case of a computer pulsated in 200 MHz using memories of types DRAM (which the time of access is of 60ns), there are 11 cycles of wait as a cycle of transfer. The performances of the computer are of as much diminished as there are cycles

Formats of Random Access Memory (RAM)

There are numerous types of random access memories. These all come in the form of barrettes of memory attachable on the motherboard.

* SIMM (Single Inline Memory Module): it is about printed circuits among which one of the faces has fleas of memory. There are two types of barrettes SIMM, according to the number of connector cables (30 or 72)

* DIMM (Dual Inline Memory Modulates) are from memories 64 bits, what explains why it is not necessary to match them. Barrettes DIMM have fleas of memory on both sides of printed circuit and have also 84 connector cables on each side, what endows them with a total of 168 brooches. They have bigger dimensions than barrettes SIMM (130x25mm).

* RIMM (Rambus Inline Memory Module, conscripts also RD-RAM or DRD-RAM) are from memories 64 bits developed by the society Rambus. They have 184 brooches. These barrettes have two notches of location (détrompeurs), avoiding very risk of confusion with the previous modules. Considering their well brought up speed of transfer, barrettes RIMM have a thermal film made responsible for ameliorating the clearing up of warmth. As in the case of DIMM, there are modules of smaller size, called SO RIMM (Small Outline RIMM), intended for laptop computers. Barrettes SO RIMM include only 160 brooches.

* DRAM (Dynamic RAM, dynamic RAM) is the type of memo most spread at the beginning of the millennium. It is about a memory from which transistors are lined up in a matrix according to lines and of columns. A transistor, coupled with a condenser gives the information of a bit. 1 byte consisting of 8 bits, a barrette of memory 256 Mb DRAM will contain 256 therefore * 2^10 * 2^10 = 256 * on 1024 * on 1024 = 268 435 456 bytes = 268 435 456 * 8 = 2 147 483 648 bits = 2 147 483 648 transistors. A 256 Mb barrette has so in reality a capacity of 268 435 456 bytes, that is 268 Mb! These are memories from which the time of access is 60 ns. On the other hand, accesses memory are made in general on data lined up consecutively in memory. So the mode of access in gust (burst mode) allows to achieve the three successive data in the first one without time of additional latency.

* DRAM FPM to speed up accesses to DRAM, there is a technology, called pagination consisting in achieving data located on the same column by changing the address of the line only, what allows to avoid the repetition of the number of column between the reading of each of the lines. They speak then about DRAM FPM (Fast Page Mode). FPM allows to acquire time of access in the order of 70 - 80 nanoseconds for a frequency of functioning that can go from 25 to 33 Mhz.

* DRAM EDO (Extended Data Out, Goes out of data ameliorated sometimes also called "hyper-page") appears in 1995. The technology used with this type of memory consists in addressing the following column during the reading of the data of a column. It creates an overlapping of accesses allowing to save time on every cycle. The time of access to memory EDO is therefore about 50 - 60 nanoseconds for a frequency of functioning going 33 - 66 Mhz. So, RAM EDO, when it is used in mode gust allows to acquire cycles of form 5-2-2-2, that is a benefit of 4 cycles on the access to 4 data. As much as memory EDO did not accept the upper frequencies in 66 Mhz, it disappeared in aid of SDRAM.

* SDRAM (Synchronous DRAM, translate synchronous RAM), appeared in 1997, allows a reading of data synchronized with the bus of the card-mother, contrary to memories EDO and FPM (qualified as asynchronous) having their own clock. SDRAM allows therefore to free itself from time of wait owed to synchronization with the card-mother. This one allows to acquire a cycle in mode gust of form 5-1-1-1, that is to say benefit of 3 cycles in comparison with RAM EDO. In that way SDRAM is able of working with a cadenza going until 150 Mhz, allowing him to acquire from time of access about 10 ns.

* DR-SDRAM (Direct Rambus DRAM or else RDRAM) is a type of memory allowing to transfer data on a bus of 16 wide bits to a cadenza of 800Mhz, what confers on him a band passer-by of 1,6 Go / s. As SDRAM, this type of memory is synchronized with the clock of the bus to ameliorate exchanges of data.

* DDR-SDRAM (Double Dated Miss SDRAM) is a memory based on technology SDRAM, allowing to double the rate of transfer of SDRAM with equal frequency. Reading or writing of data in memory am accomplished on the basis of a clock. Standard memory DRAM uses a method conscript SDR (Single Data Fails) consisting in reading or writing data in every forehead going up. DDR allows to double the frequency of reading / writings, with a clock pulsated in the same frequency, by sending data in every forehead going up, as well as in every downward forehead. Memory DDR has in general a commercial appellation of type PCXXXX where "XXXX " represent the debit side in Mb / s.

* DDR2 (or DDR-II) allows to attain twice as well brought up debit sides as DDR with equal external frequency. They speak about QDR (Quadruple Dated Fail or quad-pumped) to indicate the method of reading and used writing. Memory DDR2 uses in effect two channels separated for reading and for writing, so it is able of sending or of accepting twice more data than DDR.

2 - Upgrading Your Laptop RAM

upgrading a notebook memory is a specific simple process pending that you have the right RAM and are somewhat delicate.

There are different types of RAM, and you must choose the one that is compatible with your notebook computer. Memory is also a fragile, so you need to be very cautious when installing it. You should ensure that the laptop is turned off and disconnected from any exterior power supply. No lights should be visible.

It is a lot easier to install RAM on a laptop versus a desktop PC. Access to the memory slots is via a panel generally located in the bottom of the laptop. Once you have opened this panel with a small screwdriver you can see the existing memory. you can check the exact type of memory that your Notebook currently uses, because it is usually shown on the front of the memory strips and will be evident when you open up the memory panel.

The memory strips are generally locked in with small clips on the ends of the strips. To take out existing memory, simply flip the clips and then remove the memory strips gently from their holding place. If you are simply adding memory, and there is space available, just add the new memory, gently pushing it in to ensure it is fully seated in the slots, and then push the clips to hold the new memory in place.

Once you have replaced or added your Notebook computer memory, replace the access panel, and then screw the panel back in place. Lastly, power up the notebook, When the PC starts up, it will count the memory and tell you how much RAM is loaded on your laptop.

As long as you have right memory, the whole operation should take less than 5 minutes, you can then enjoy your faster, less crash prone laptop.

Read more.....

Rabu, 06 Februari 2008

Percepat Startup

Secara default, Windows akan membuat catatan mengenai aplikasi yang Anda jalankan saat Windows bekerja. Catatan tersebut digunakan sebagai bahan untuk optimasi sistem agar Windows dapat bekerja lebih cepat, terutama saat baru dinyalakan. Begitu kondisi standarnya.

Fasilitas canggih ini cukup bermanfaat bagi Anda yang tidak neko-neko ketika menggunakan PC; selalu menggunakan komputer untuk rutinitasnya. Kondisi akan berbeda jika Anda tipe petualang, artinya Anda doyan menggonta ganti aplikasi. Kebiasaan Anda itu akan membuat langkah optimasi Windows menjadi sia-sia. Sebab, tidak ada pola teratur dari Anda. Selain itu, aplikasi Anda yang begitu beraneka ragam dapat membuat folder tampungan prefetch membengkak.

Nah, makanya, bersihkan folder untuk prefetch dengan cara berikut ini.

Buka Windows Explorer, dan masuklah ke folder C:\WINDOWS\Prefetch.
Blok semua file, atau tekan kombinasi tombol [Ctrl] + [A] untuk memilih semua file yang ada di dalam folder. Kemudian, tekan tombol [Delete] pada keyboard. Tekan [Yes] saat mungul jendela konfirmasi.
Restart komputer dan perhatikan startup Windows akan menjadi lebih cepat dari biasanya Read more.....

Sembunyikan My Computer

Menu My Computer memberikan akses ke berbagai kandar di komputer, System Properties, dan berbagai akses ke komputer lainnya. Membiarkannya tetap berada di desktop dan menu start akan mengakibatkan orang-orang yang tidak berhak dapat mengakses PC Anda dengan mudah.

Untuk mengamankan itu, kali ini kita akan menghilangkan My Computer dari desktop dan menu start dengan mengedit registri. Berikut ini adalah caranya.

Buka Registry Editor. Masuklah ke sub key berikut: HKEY_LOCAL_MACHINE\Software\Microsoft\Windows\CurrentVersion\Policies\NonEnum.
Klik [Edit] > [New] > [DWORD (32 bit) value].
Beri nama DWORD value baru tersebut dengan nama {20D04FE0-3AEA-1069-A2D8-08002B30309D}.

Isikan value data-nya dengan nilai 1.
Restart PC untuk merasakan perubahan.

[NOTE : Cara mengembalikan : Isikan value data-nya dengan nilai 0.] Read more.....

ChatBox

Label

Donasi

Your donations are very appreciated and will help to keep Affandi Blog Site's up and running
R.M.Affandi Akbar
Lahir di jakarta,16 Mei, Hanya seorang anak kelas 11 ipa SMAN 48 Jak-Tim ,Bercita-cita menjadi dokter dan mencoba membuat sebuah blog, saya bisa di hubungi di
website counter
 

Sponsor

Template by NdyTeeN